No-Sew Swishy Superhero Cape (or Apron)
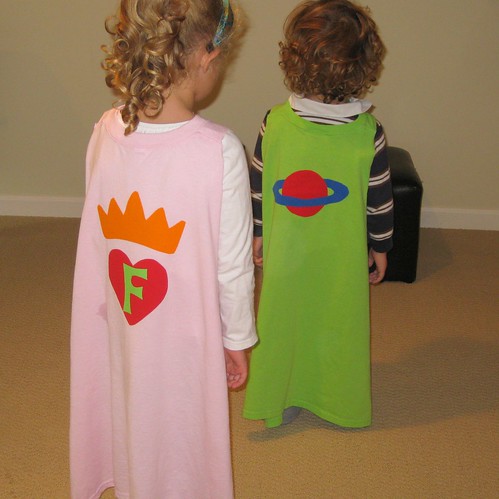
These capes require absolutely no sewing, just some scissors and an iron. I came up with the design after being asked to find something boy-friendly for our Mom's Craft Night. These are nice swishy, triangular-shaped, capes.
(The same method can be used to make no-sew aprons by following the instructions for a cape, and then cutting 2" wide strips parallel to the outer edges, to approximately waist level. These strips become the waist ties for the apron.)
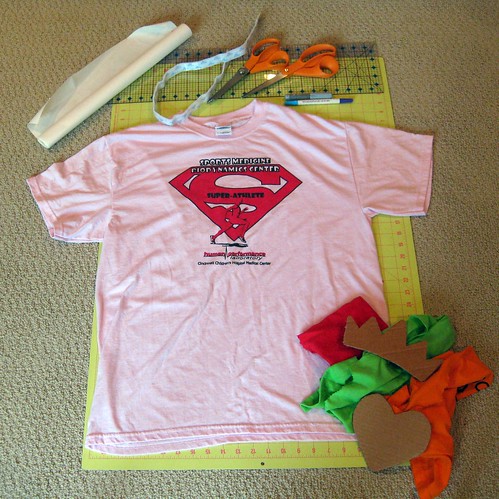 To make a cape you need:
One old t-shirt plus some scraps from other t-shirts for the applique.
Fusible webbing.
Iron-on Velcro.
It works best if the t-shirt has no side seams and is completely plain on either the front or the back (unless you want to incorporate the design on your t-shirt into your cape). The length of the t-shirt is the length the cape will be so you might not want a really huge one if you're making it for a tiny person (although you could always trim the bottom). The way it is cut out uses some of the front of the t-shirt (which is why it is best to not have side seams) to give it lots of width, so you can make quite a good swishy cape from a small or medium size adult t-shirt.
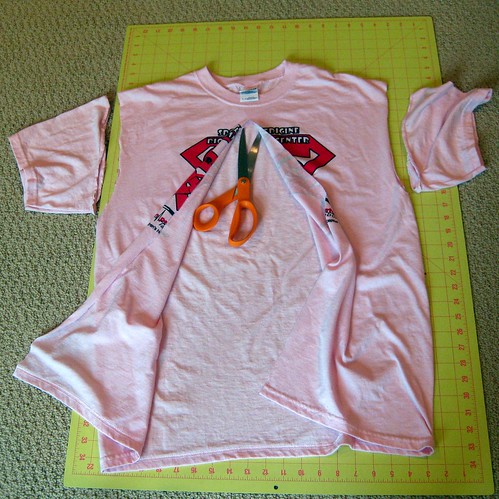 Start by cutting off both sleeves at the armholes (not absolutely necessary, it just makes it easier to lay it all flat later).
Make a cut up the centre of the front (for t-shirts with printing on the front or plain ones, if the printing is on the back then cut up the back!), STOPPING ABOUT 1" FROM THE NECKBAND. Make sure you don't accidentally cut the fabric underneath!
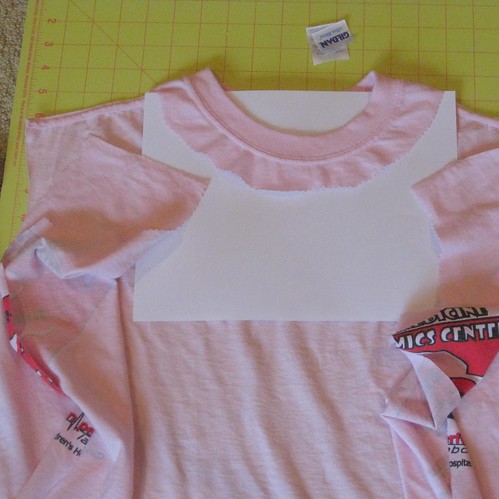 Using pinking shears (if you have them, otherwise regular scissors will work just fine) make a cut following the shape around the front of the neckband, about 1" away from it, stopping at the shoulder seams of the t-shirt. Then cut along the shoulder seams to the armholes on both sides. Cut off the label if there is one.
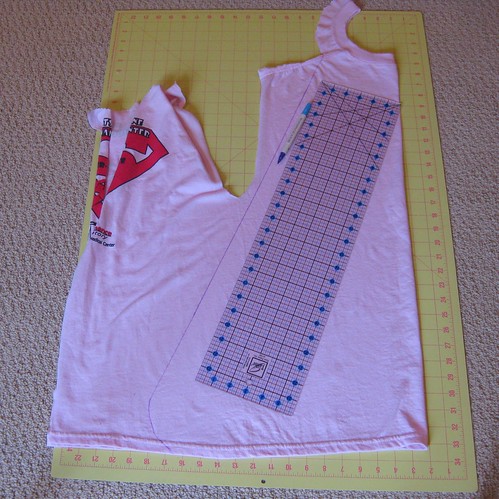 Open it all out and lay the shirt flat and then fold in half down the center. Draw a straight line from the corner of where you cut around the neckband down towards the hem of the t-shirt making sure to avoid the armholes. Use a disappearing pen or chalk if you have one to draw the line, otherwise cut inside the line so you don't see it on the cape. Add a little curve at the bottom to round off the bottom edge of the cape unless you are making an apron. For an apron cut it straight and then you can add a curve once you've cut your waist ties.
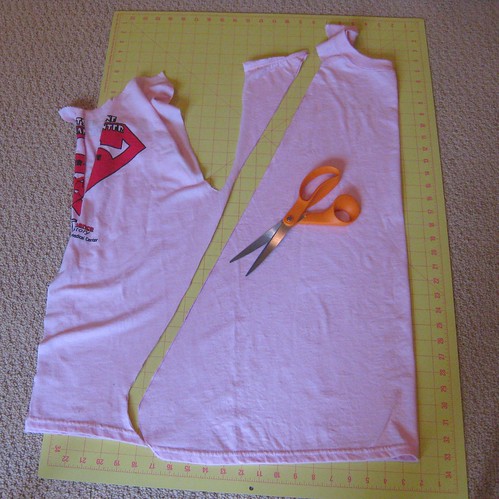 Cut along your line through both layers.
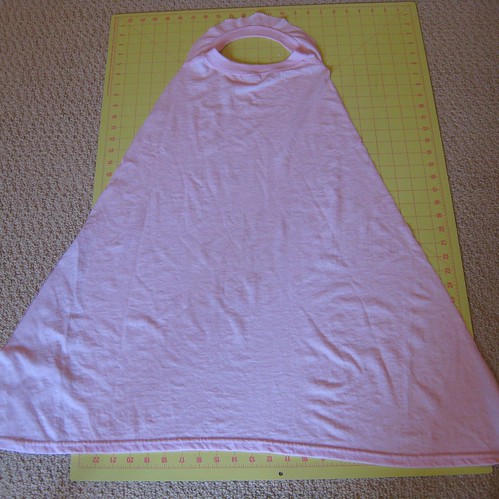 Open it out and you have a cape!
You could stop here but I think they look best with some embellishment, and I like to put Velcro at the neck for safety. If you want to make an apron now is when you would cut a strip 2" parallel to the edges, stopping at waist level.
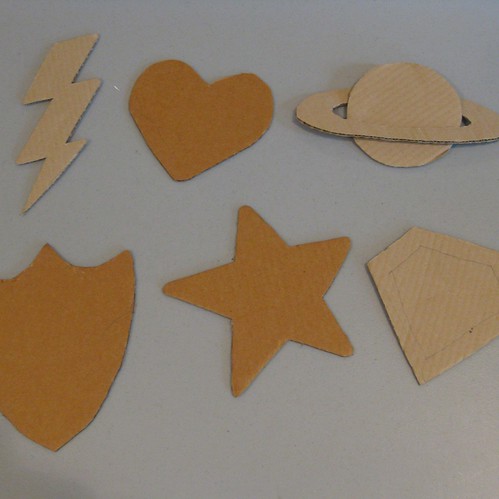 Decide what design you want on the back. For our Craft Night I made some templates that people could use as a base for their designs. It works best it there are no sharp corners so that the design doesn't peel off so easily (because we're not sewing it on!).
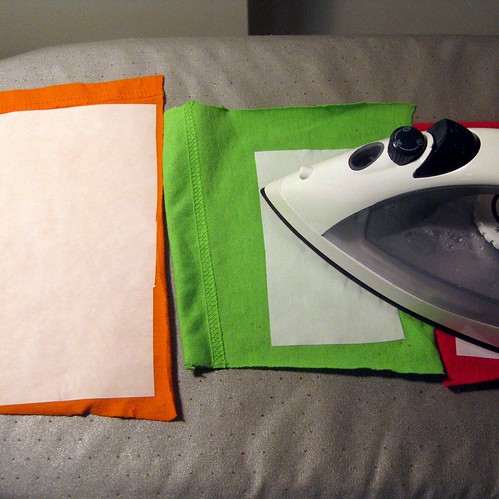 Cut some pieces of fusible webbing the right size for your design and iron them on the back of some t-shirt scraps (one advantage of having lots of people make these at once is that you get lots of scraps to choose from!).
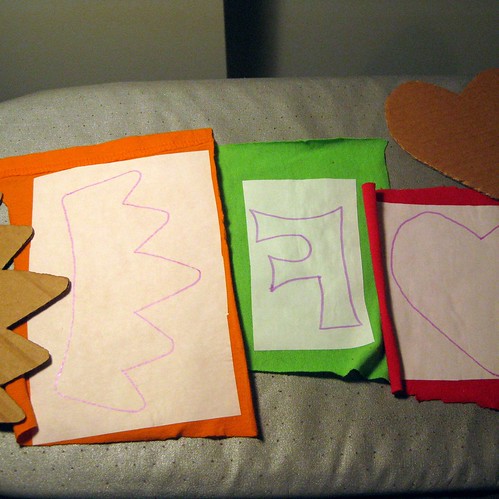 Draw out your design onto the fusible webbing backing paper. Remember it will be REVERSED when you iron it on so if your design is not symmetrical make sure you flip it before you trace it out. (And yes, I know I'm ignoring my own advice about sharp corners on the F!).
 Peel the backing paper off the fusible webbing.
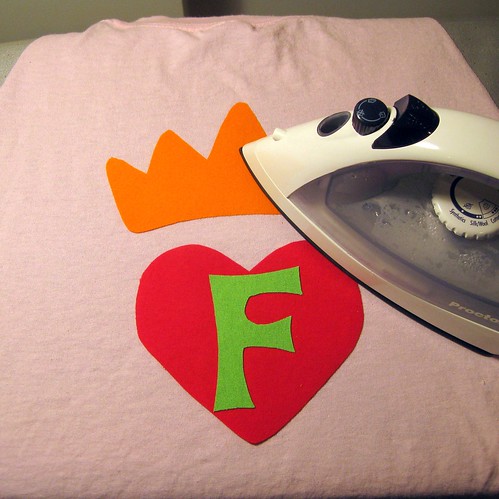 Arrange the design on your cape and iron it on according to the instructions for the webbing you are using.
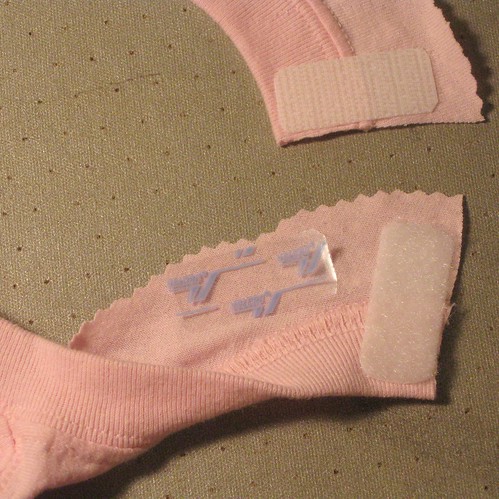 The last step is to apply some Velcro to the neck. Cut right through the neck band at the front and then cut a length of iron-on Velcro to fit. Iron it on following the instruction in the pack. For these it was 90 seconds each side with a hot steam iron. Let it cool and check it's not peeling at the edges, if it is iron again.
Try and convince your children to model them for you!
posted by Gail at
September 09, 2011
4 Comments


